


How to Change Guitar Strings on a Steel String Acoustic Guitar
Acoustic guitars are generally fitted with steel strings, while classical guitars are generally fitted with nylon strings. In this blog post we’ll show you how to fit steel strings onto your acoustic guitar.
Steel Strings
There are many types of steel strings available. Steel strings come in a variety of gauges and types of windings, and can also be manufactured from different types of metal. Steel string gauges vary from extra light to extra heavy. If you are learning on a steel string guitar then a light or extra light gauge is recommended.
Almost all steel string guitars have two unwound strings (strings 1 and 2) and four wound strings (strings 3-6). See the image below.
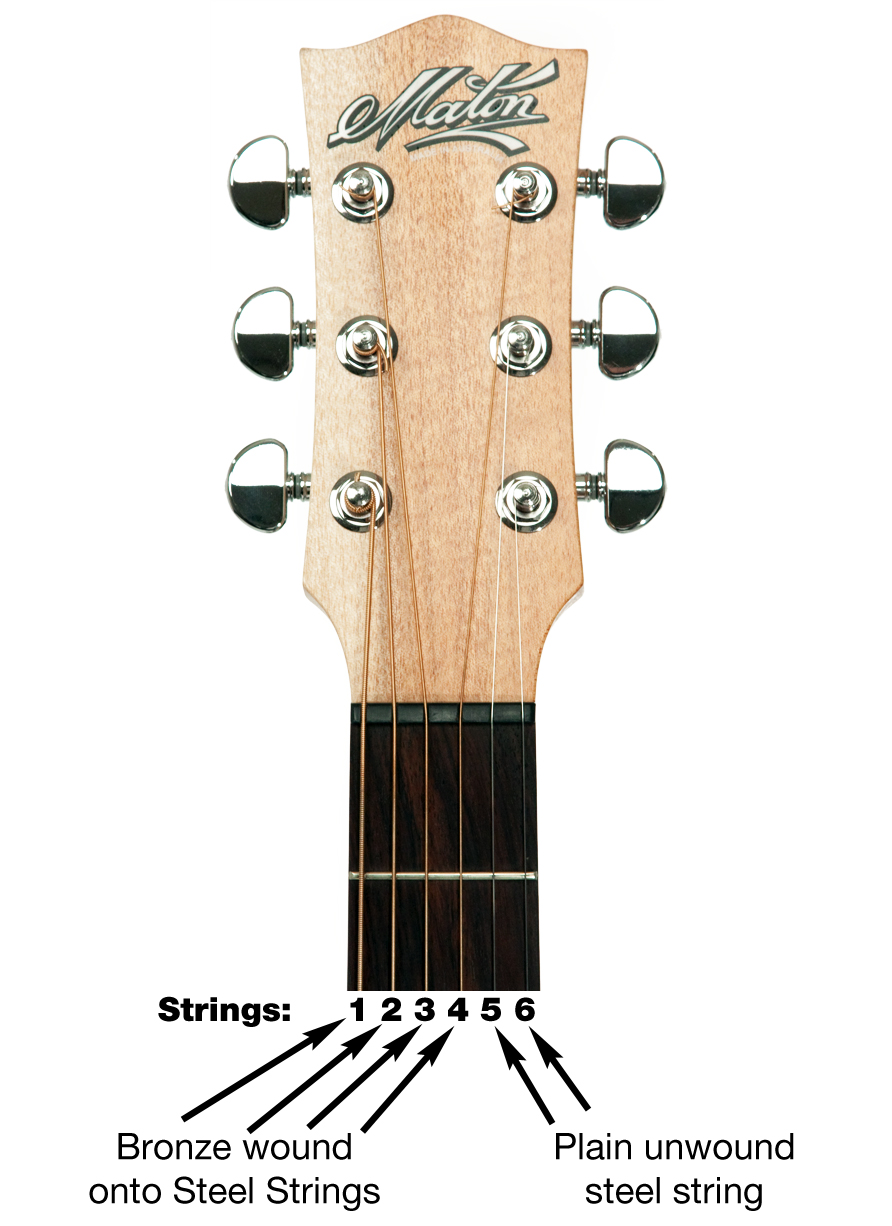
The wound strings contain an inner core and an outer core, of which there are two main types: round-wound and flat-wound. Round-wound strings are the most popular, and are made of round wire coiled around an inner steel core, producing a definite coiled string. This type of string produces a strong, rich and loud sound. Flat-wound strings use a strip winding to give a smooth feel to the string. This type of string produces a soft, mellower sound and is recommended for beginning guitarists since it is easier on the fingers.
The most common material used for wound steel strings is bronze, although nickel, brass and even stainless steel strings are also available. A reputable music store will be able to assist you with providing the correct strings for your steel string guitar.
How to Change the Guitar Strings
Fixing the String to the Bridge:
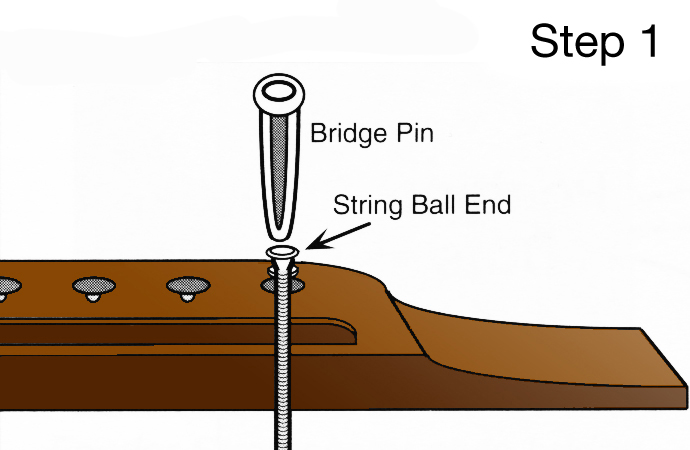
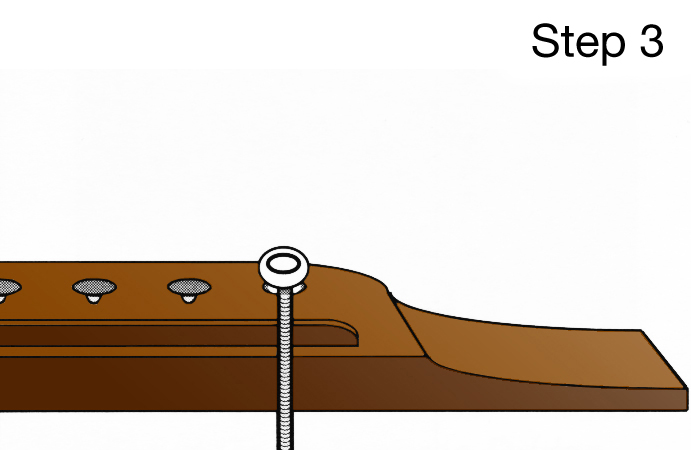
All steel strings have a steel ball tied to the end of the string. The ball is poked into a hole in the bridge and held into place with a bridge pin. The bridge pin has a slot cut into it to accommodate the string. To fix a guitar string to the bridge, study the following steps carefully:
Fitting the String to the Tuning Key:
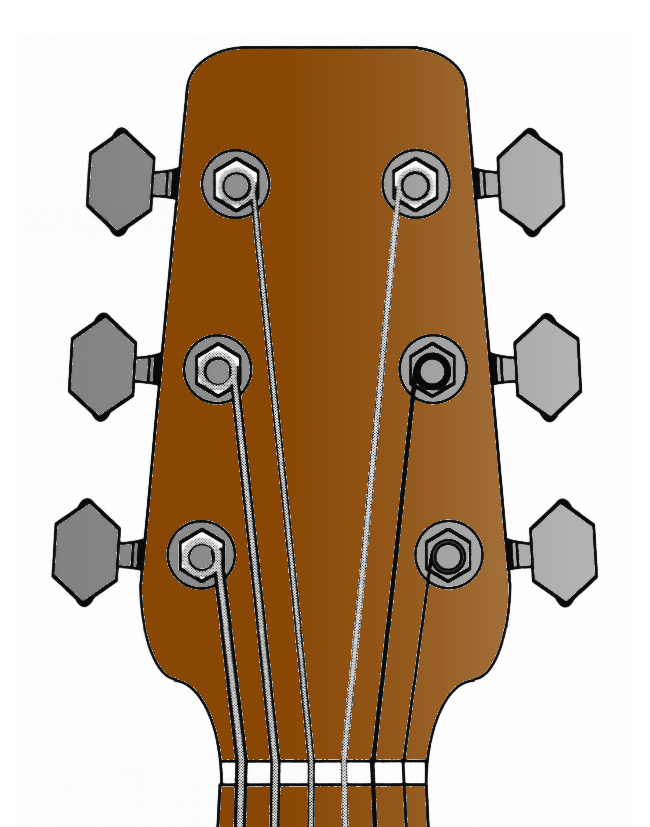
When fitting a string to the tuning key the string is inserted through the tuning key hole only once. The string is then neatly coiled 4 – 5 times around the barrel of the tuning key from the top of the barrel near the hole to the base of the barrel. See the diagram below.
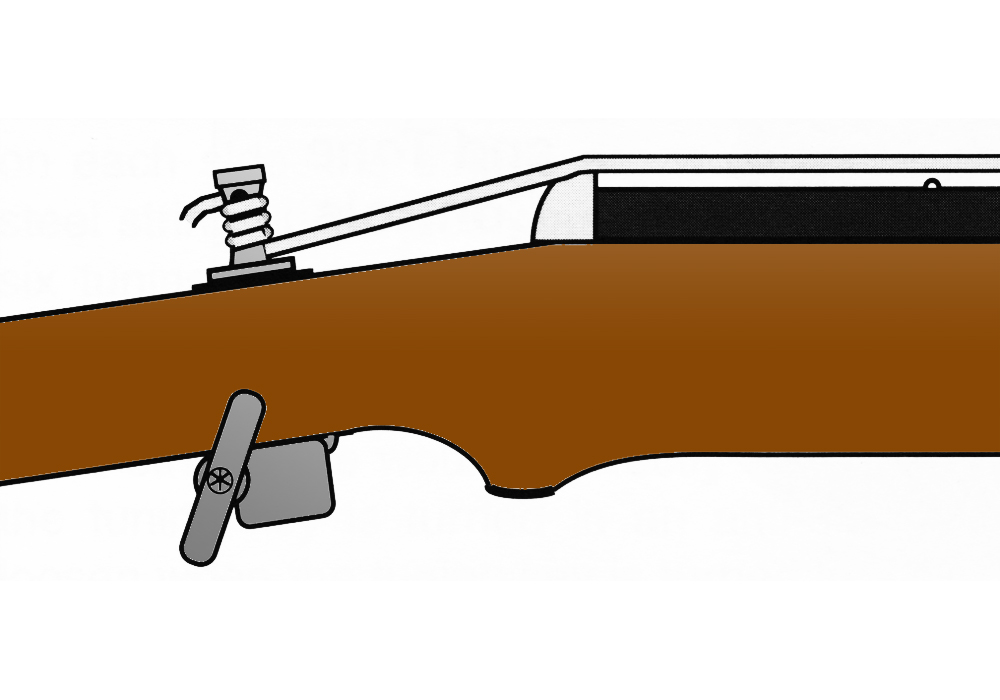
It is essential that the strings are wound onto the barrel of the tuning key from the correct side. Turn the tuning key so the string is wound inward towards the centre of the head (anti-clockwise), not towards the outside of the head (clockwise). Study the diagram below to familiarize yourself with the correct positioning of the strings.
Tuning Your New Strings
Attach all of the strings first before you attempt to tune your guitar. Getting the guitar correctly tuned is very important, especially as a beginner trying to train your ear. If you have trouble tuning your guitar, it’s a good idea to ask for help while you’re first learning. For further information you can also follow our “How to Tune a Guitar” blog for more tips.
It is usually more difficult to keep your guitar in tune immediately after fitting new strings. Therefore it is best to “wear in” your new strings by stretching and re-tuning your strings several times before you begin playing again. To do this, simply tune each string to its correct pitch, then use your hands to manually lift each string up off the neck and “stretch” it from the nut to the sound-hole. After stretching your strings you will need to retune them.
Once your new strings are fitted, stretched and tuned, you can neaten up the headstock by using pliers to cut the excess length of each string near the barrel of the each tuning key.
How Often Should I Change My Guitar Strings?
The life of a guitar’s strings vary from string to string and guitarist to guitarist, with a variety of factors contributing to aging. Over time oils and dirt will build up on your strings, and make them stretch – causing them to sound dull and flat, eventually becoming prone to breaking. Factors that can cause your strings to age more quickly are:
- Playing with dirty hands or not keeping the neck of the guitar clean
- Playing often
- Playing vigorously or being “hard” on your strings
Regardless of how much care you take to keep your strings alive longer, they will eventually age and need replacing. You will know they need replacing when:
- your guitar starts to sound flat
- your strings look tarnished
- your guitar becomes harder to tune
Guitarists who love a fresh sound (or play their instrument heavily) may change their strings every couple of weeks, while those who love a “worn in sound” will keep them going as long as possible. On average, you should aim to change your strings every 2-3 months.
Who is LearnToPlayMusic.com
LearnToPlayMusic.com is the world’s leading music education innovator and publisher of print, eBooks, apps and online lessons.
– Continue learning with Learn To Play Music at LearnToPlayMusic.com


Leave A Comment
You must be logged in to post a comment.